
One of the sweetest features of the most popular email marketing software is custom signup forms. You can host your own MailChimp signup forms on your website. Even have custom embedded form success messages.
The downside of having these custom MailChimp forms and success messages is that it is not the most straight forward thing to setup. You will have to get into some basic HTML editing and inspecting elements using your browser.
Luckily, it should be a piece of cake for web developers! It should go without saying, but you will obviously need a MailChimp account to create these custom signup forms. The nice thing is that you can do all of this with any level of account. Free or paid. And I like free.
Why use custom MailChimp signup forms?
If you have been around the block (or even new to the block) of email marketing, then you may understand the need and desire to have custom signup forms in your marketing efforts. The first and most obvious reason is for brand recognition. You want your custom signup forms to actually match your site or offerings. If your signup forms don't match, or closely resemble your website, then potential customers could get confused. They may think a strange redirect has taken them else where and not to join your mailing list.
How to create custom MailChimp signup forms
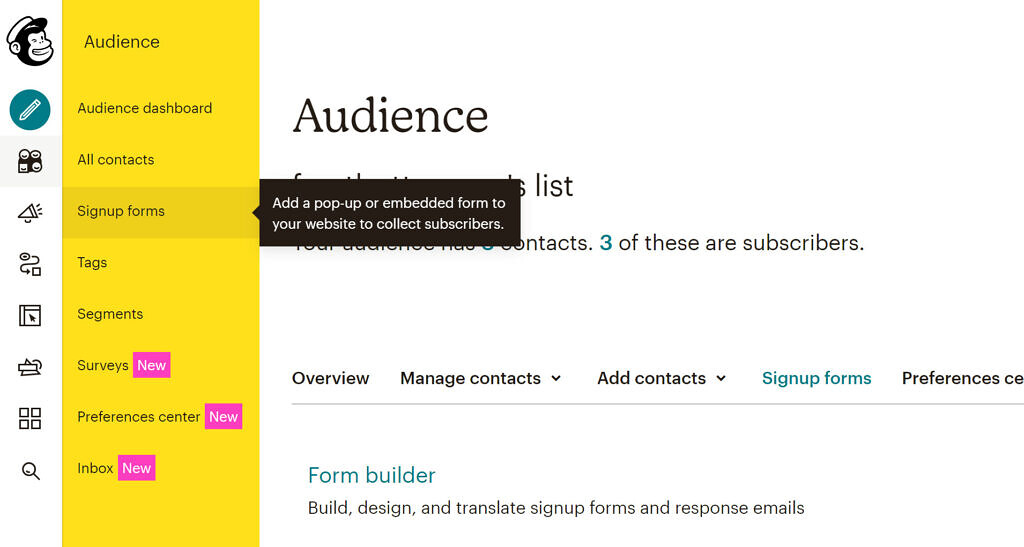
Once you login to your MailChimp account, you must open the Audience tab from
the navigation menu. From there, select the Signup Forms link.
Inside of the Signup Forms page, you will see several options for the different
types of signup forms and options MailChimp offers. For now, we are just
concerned with one of them: Embedded forms.
Create a custom embedded form
From inside of the Embedded forms page, MailChimp gives you a basic form to
work with. That's mighty cool of them and all, but who wants a basic form when
you can have a custom signup form. Right?
These basic signup form they give has all the special sauce that you need for your customized form. The HTML input tags and codes. You need to grab a few of the specific form elements and attributes from this MailChimp form and set it inside of your custom signup form. Specifically, the ones listed below:
- you will need to use the exact form action url that is given inside of the basic form. This will allow your self hosted custom signup form to link back to our MailChimp account
- make sure you use the exact email field name that is given
- include the entire line of the extra text field that is used for bot and spam protection. Keep in mind that by default, this element will be displayed on your custom page and you will need to use CSS to hide it from regular and real users. (using CSS to hide it is exactly what MailChimp does too)
Once you have all of these pieces of form data, you can add them into your custom signup form on your website. Then style that sucker however you want and make it match your brand so much more closely.
To get the best results, bew sure to add a custom success message for your embedded form.
Custom MailChimp embedded form success message
Having custom MailChimp signup forms would just not be complete without custom embedded form success message. Of course! The idea is that after a new person signs up on your custom embedded form on your website, they should be redirected back to your website. Seem obvious, but not enabled by default. By default, MailChimp will give them a default success message directly on your MailChimp hosted form. Let's fix that.
To create a custom embedded form success message:
Browse back over to your Audience → Signup forms page in MailChimp. Open the
Form Builder:
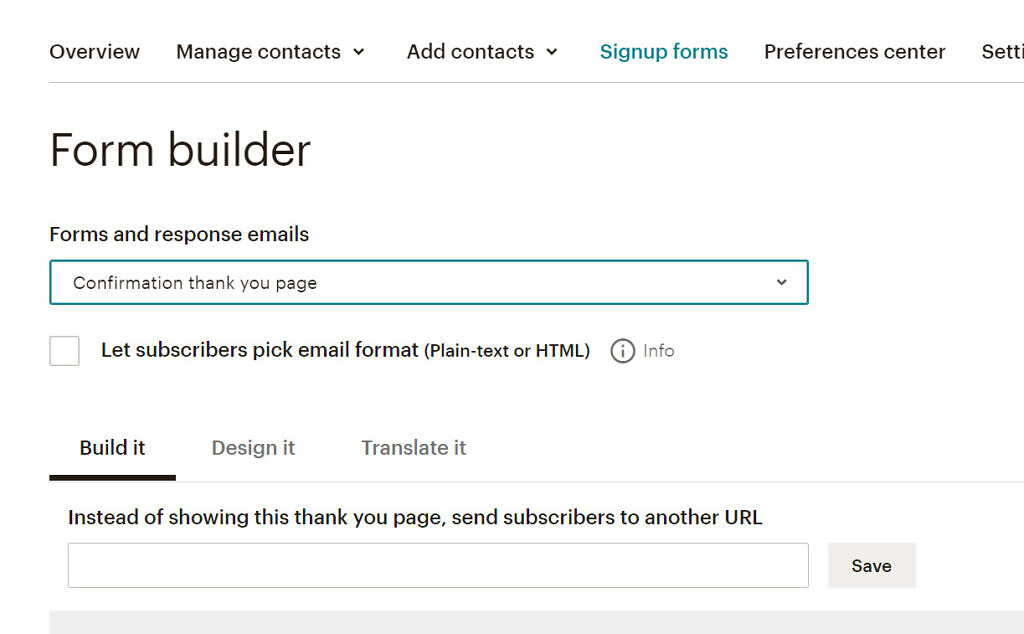
Inside the Form Builder, you will see a dropdown to select the
Forms and response emails. In this drop down, select
Confirmation thank you page. The visual editor will update with the current
(and default) success message.
This default-AF success message is what your new mailing list signups will see. Not so pretty.
To use a custom success message on your signup forms, you have two options:
- edit this "Confirmation thank you page" MailChimp will host and display to you, or...
- host your own success message and use the "send subscribers to another url" option
Being a developer, I like the second option of hosting my own success message and redirecting the user back to my website. This makes the people who join my mailing list start and end on my website. I can give them incentives or display some quick social media share buttons to hopefully get some extra boosted backlinks or virality on my products and sites.
I originally went through this process to create custom MailChimp signup forms and success messages when creating the alpha version of finbab.com, my new personal finance app project. If you are interested in following along on the development of this personal finance app or enjoy tracking your expenses, then please do check it out.