
Sometimes you have a video editing project and you just need to "export transparent video". This is how to do it in Adobe Premiere Pro.
We are going to export a video that has a solid background color (like a green screen or "ultra key") to a video format that can support transparent backgrounds. Then you can quickly import that transparent video in any video editing project your heart desires (as long as you have the video codec installed).
Quick Steps to Export Transparent Video with Alpha Channel in Premiere Pro
- Load your Adobe Premiere Pro project
- Open the Export Settings window
- Select QuickTime format
- Enable the alpha channel render
- Export your video and enjoy!
Sometimes it is better to create a "green screen effect" instead of an alpha channel video, like in this tutorial.
Want a green screen tutorial?
I also have another how-to green screen tutorial for Adobe Premiere Pro too!
Load your Adobe Premiere Pro Project
Load up the video project you want to export with a transparent background on Adobe Premiere Pro. Finish making all your edits to get your overlay video ready for production.
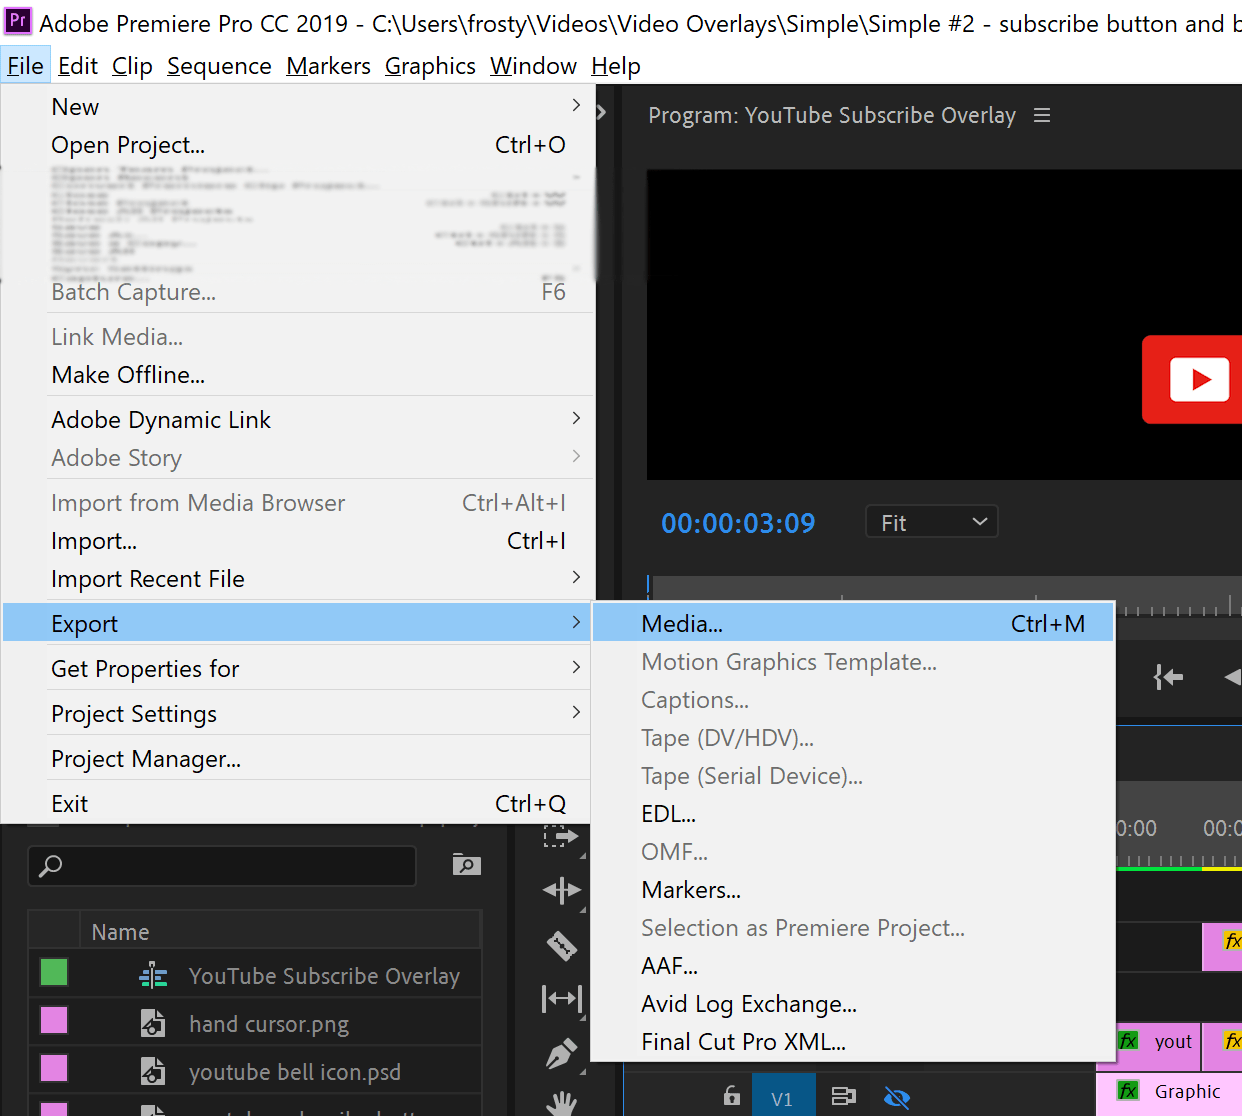
Open the Export Settings Window
When you are ready to export your video project, open the "Export Settings" menu via the top file menu like below:
Open the "Export Settings" window by going to: File -> Export ->
Media
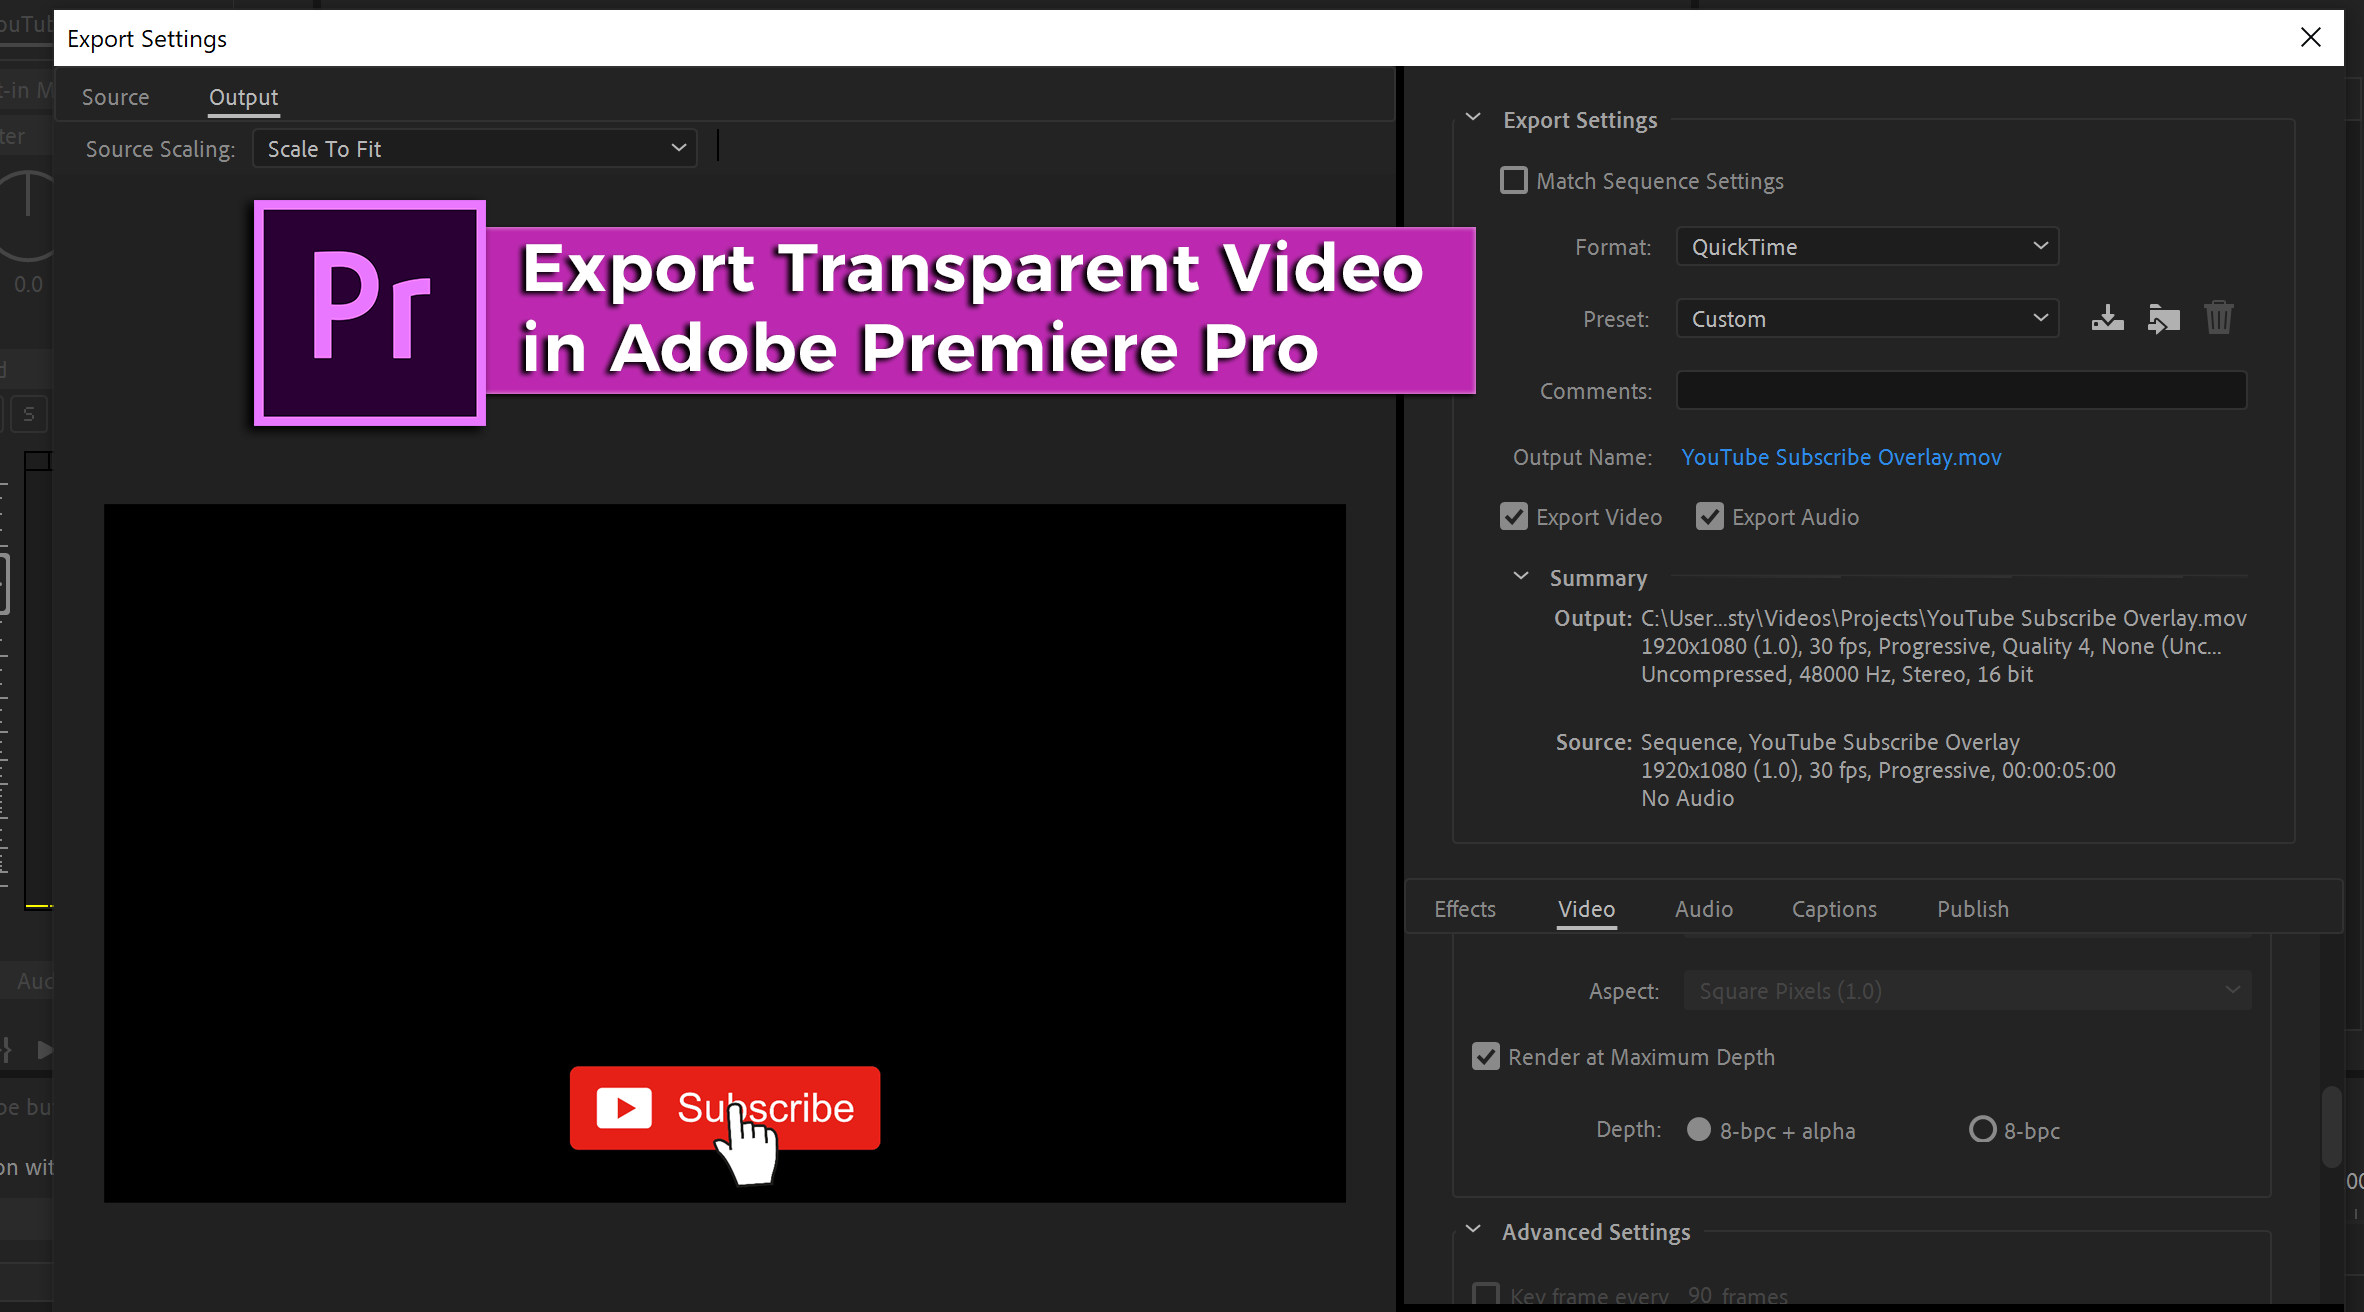
Configure the Export Settings for Transparent Video Backgrounds
Once the Export Settings window is open, there are actually only a few settings you have to set in order to export video with a transparent background.
Set a video format that support transparency
On the right hand side of the window, locate the export format. Set this to "QuickTime". No matter what you normally export your videos as, you pretty much have to use QuickTime to export for transparent backgrounds.
Almost every video codec does NOT support transparent videos. Kind of like how GIF and PNG images are the only image formats that support transparency. JPEG does not.
QuickTime is pretty much the only codec that supports transparent backgrounds.
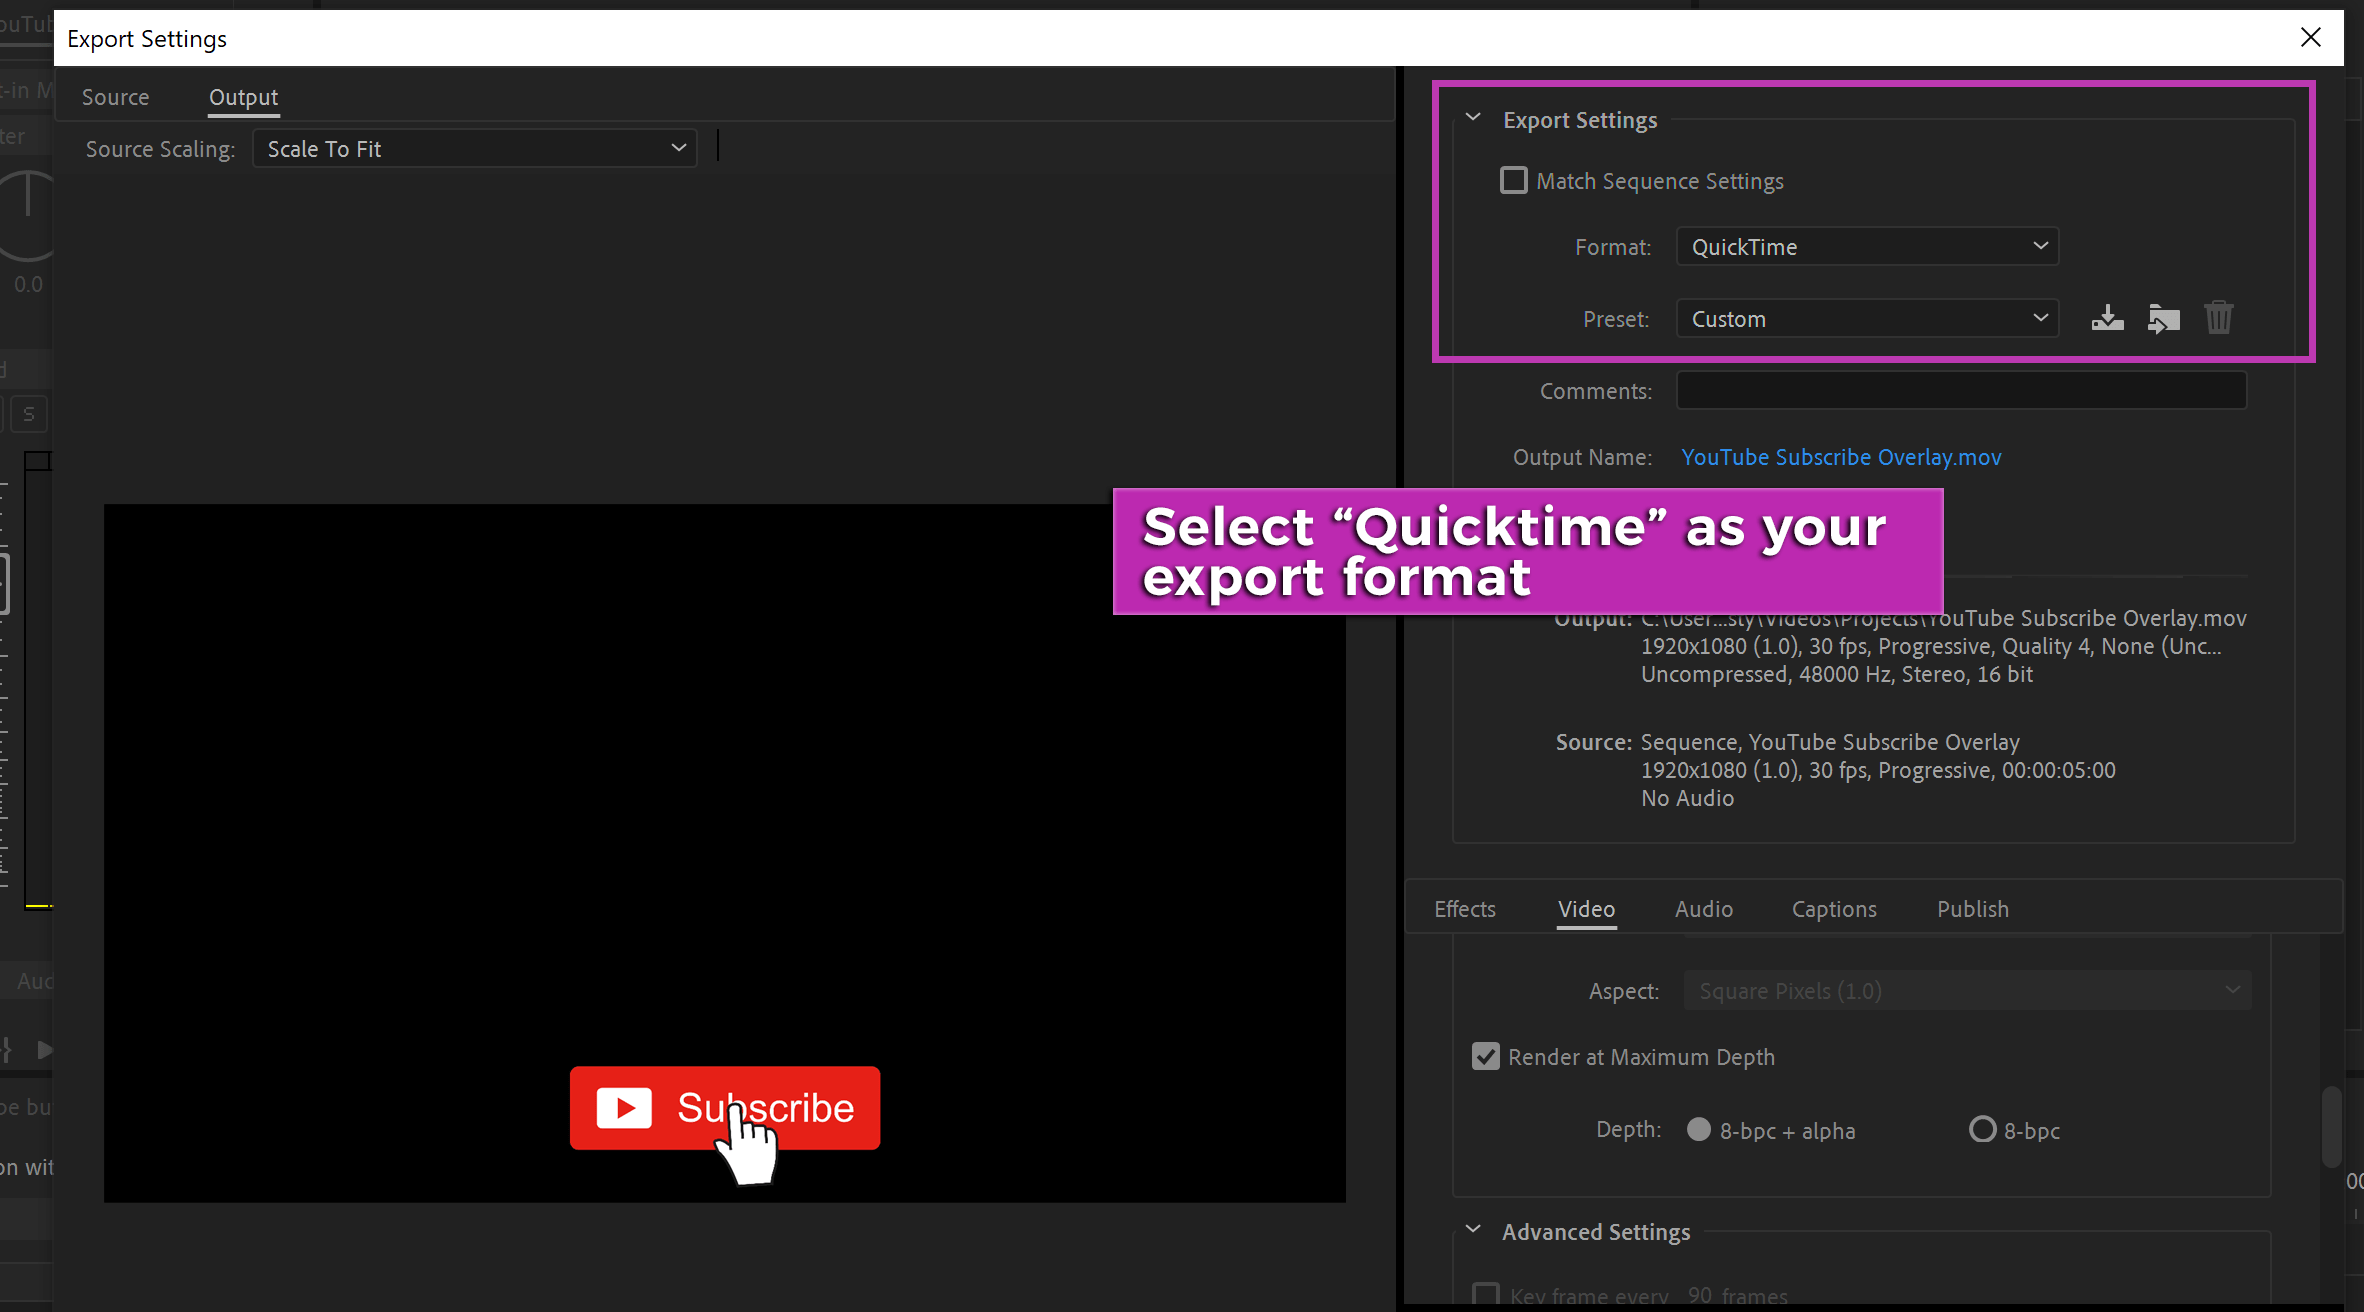
Don't worry though, even though you might not prefer to export using QuickTime and get a MOV format video file, you can still import a MOV video file into nearly any video editing software. Especially the big ones like Adobe Premiere Pro and iMovie.
Enable the alpha channel render option
Now that you have your video export format set, look a little further down that same column. You will see some tabbed areas labeled "Effects", "Video", "Audio", etc. Select the "Video" tab.
This video tab will give you some unique settings for exporting your Premiere Pro projects. Most notably, the video codec and alpha channel options.
Under the "Video Codec" settings, browse though the options and select the "None" options. I have found that setting this option to none seems to give the best results for transparent backgrounds. Especially for video overlay animations, like a YouTube subscribe button video animation.
The downside of setting this video codec option to "none" is that the file size will be a little bigger. But for short videos like overlays the files will already be pretty darn small anyway.
Now to select the alpha channel
Locate the "Basic Video Settings" options and scroll down to the bottom of it. You should see a "depth" option. This is where you enable the alpha channel in the export settings. And that alpha channel will allow you to export transparent video backgrounds.
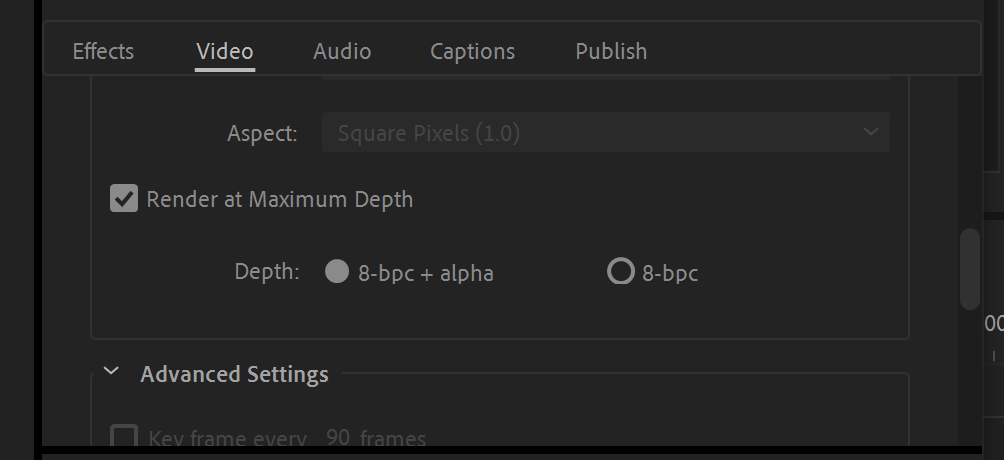
Enable the alpha channel by clicking on the button with the " + alpha" option on it, under the "Depth" setting. Then be sure to also check the box for "Render at Maximum Depth". Getting that max depth will make the transparent video render a lot smoother and gives WAY better results, especially for higher quality videos and higher quality monitors.
Export your video and Enjoy!
After configuring those export settings, go ahead and export your video project. You can now take that MOV file Adobe Premiere Pro gave you and import it into any other project. I don't think I have to tell you how useful it is to export transparent video backgrounds in Premiere Pro.
Happy editing!