
Working with a green screen, or "chroma key", in video editing is such a cool effect.
With this green screen tutorial, you can change the background of any green screen video all in a matter of minutes. This article will cover how to use the "ultra key" effect in Adobe Premiere Pro CC to get your own custom green screen (chroma key) effect done.
Quick steps to use Green Screen effects
- Open your Adobe Premiere Pro project and import your green screen video
- Add your green screen video on the timeline
- Add "ultra key" effect to the green screen video
- Set the ultra key effect's "Key Color" to the green screen color
- Enjoy your sweet green screen video!
Want to export transparent video backgrounds?
Looking for how to export transparent video backgrounds in Adobe Premiere Pro tutorial? I have an article on that too :)
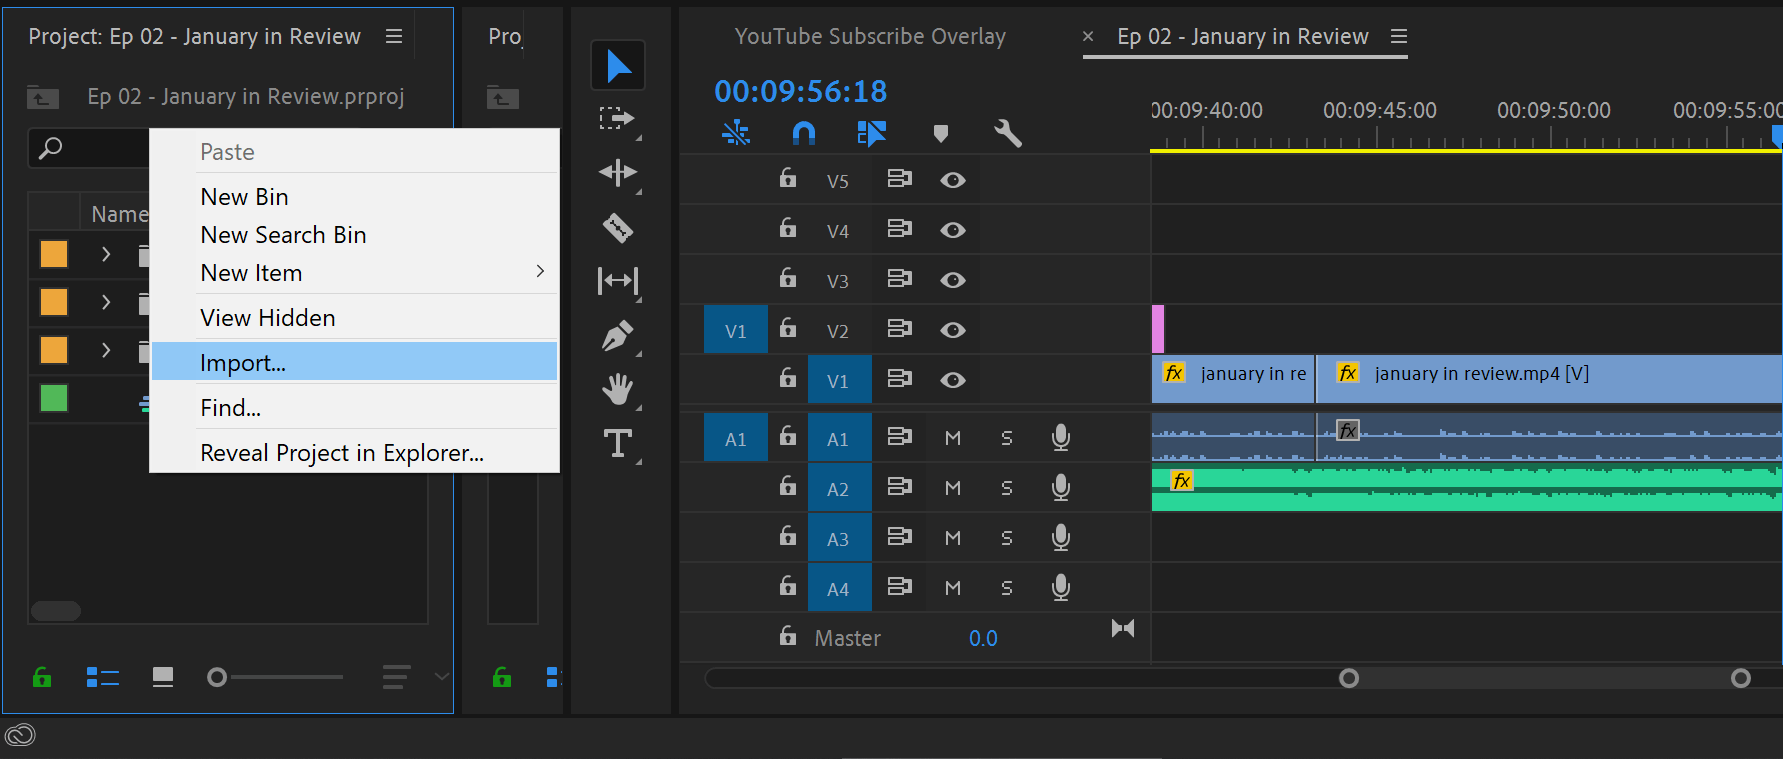
Step 1: Open your project and import green screen video
After you have your Adobe Premiere Pro project open, import your green screen video into your project by right clicking on the project panel and clicking on "Import". Then browse over to your green screen video you are trying to add the effect to. For this green screen tutorial, I am using a YouTube subscribe button video animation.
Step 2: Add your green screen video to the timeline
Once your green screen video clip was imported to your project, you can add it to the timeline. Select the rough desired time on the timeline where you want the clip to be. Then add the clip to the timeline using one of these methods, depending on if you want to keep the green screen clip's audio:
Method 1 (with audio option):
Drag and drop the video clip onto the timeline to your desired placement. Keep in mind that this will add both the video and audio from the green screen clip to the timeline. So make sure you place the clip in a good video/audio track that does not overwrite your existing project audio. Unless that's what you want, in which case go nuts.
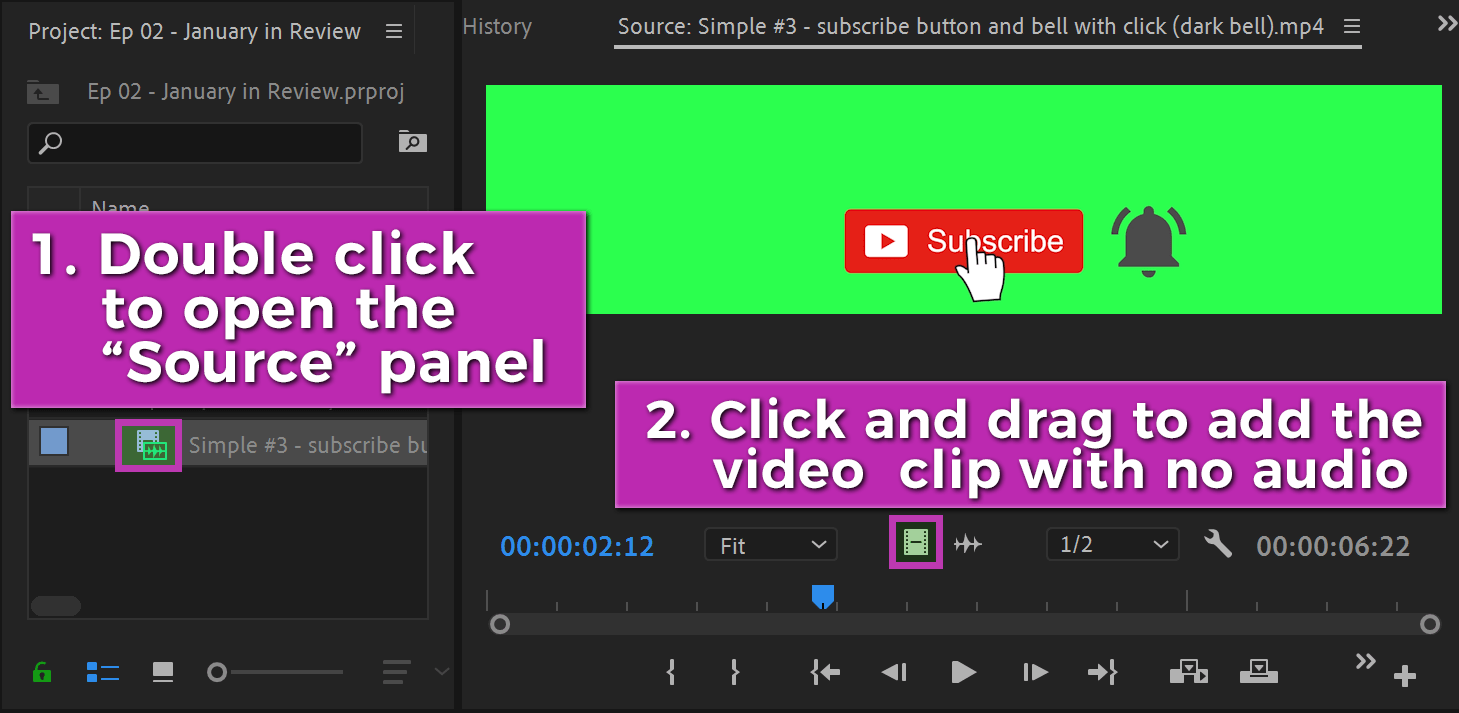
Method 2: (no audio option):
In the Project panel, double click on the little video reel icon on the video file itself. This will open the video clip for viewing. In the center of this new "Source" panel, click and drag the grey video reel icon to your timeline. This will add just the video clip to the timeline. Not the audio from it.
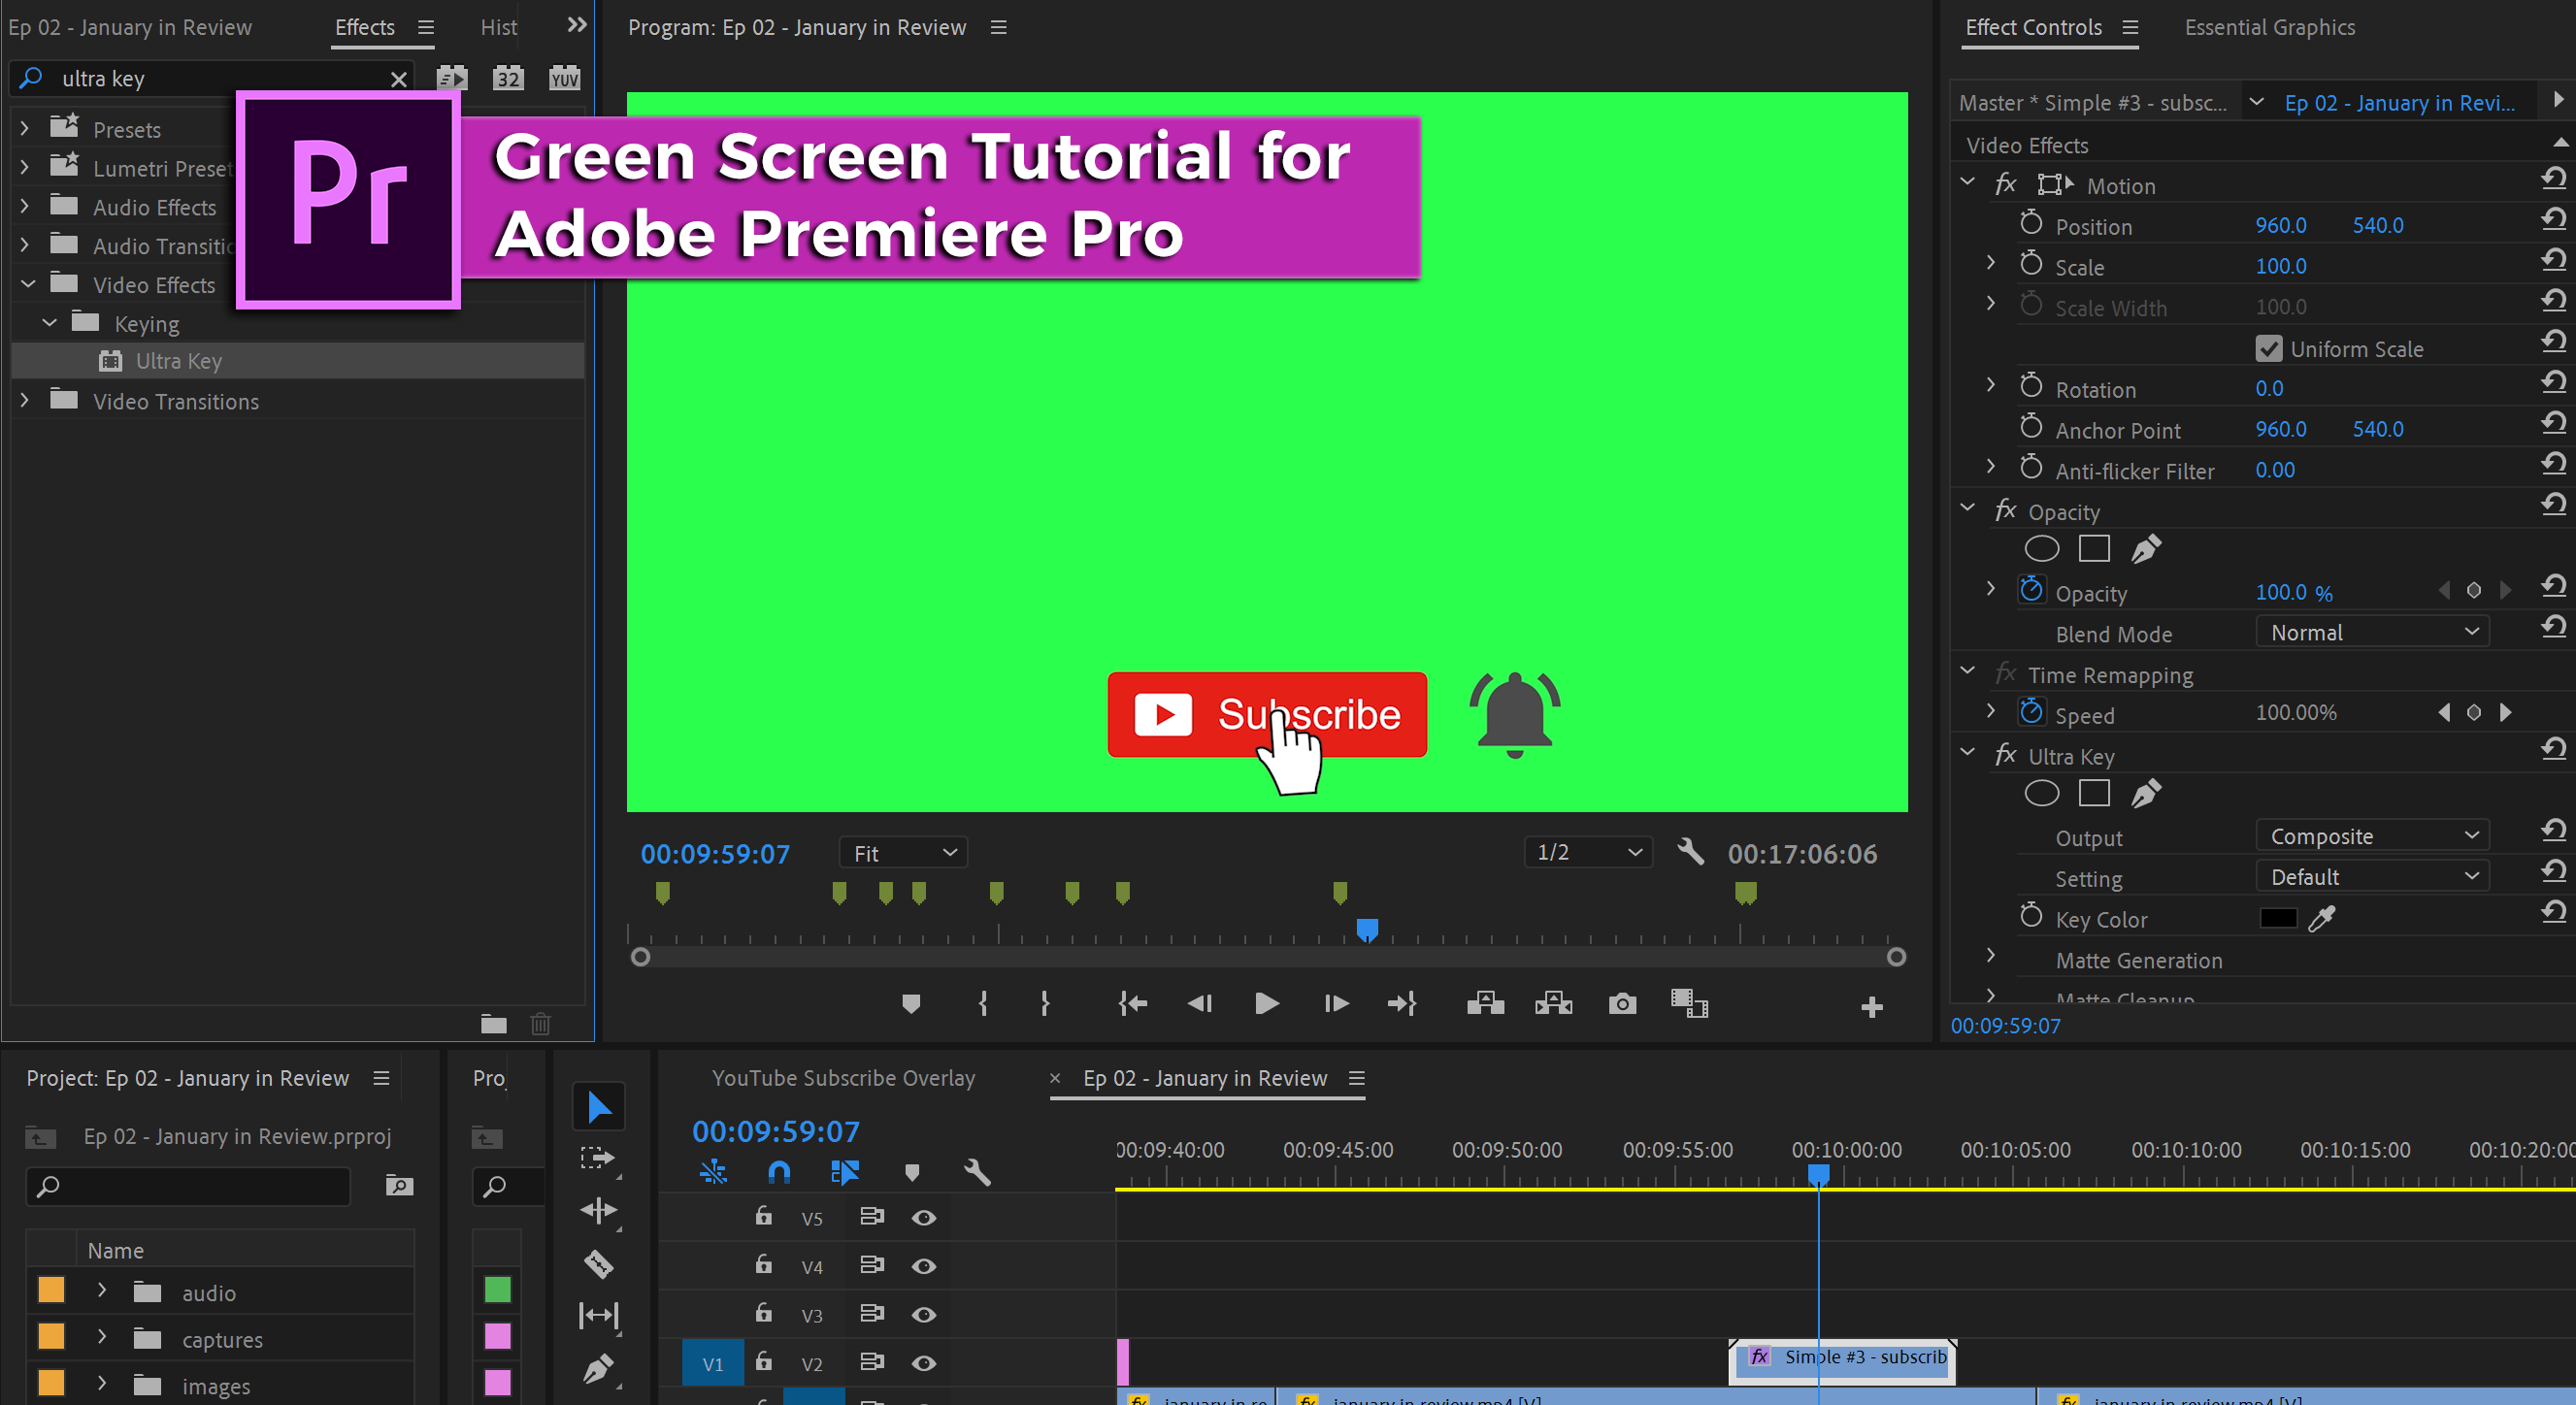
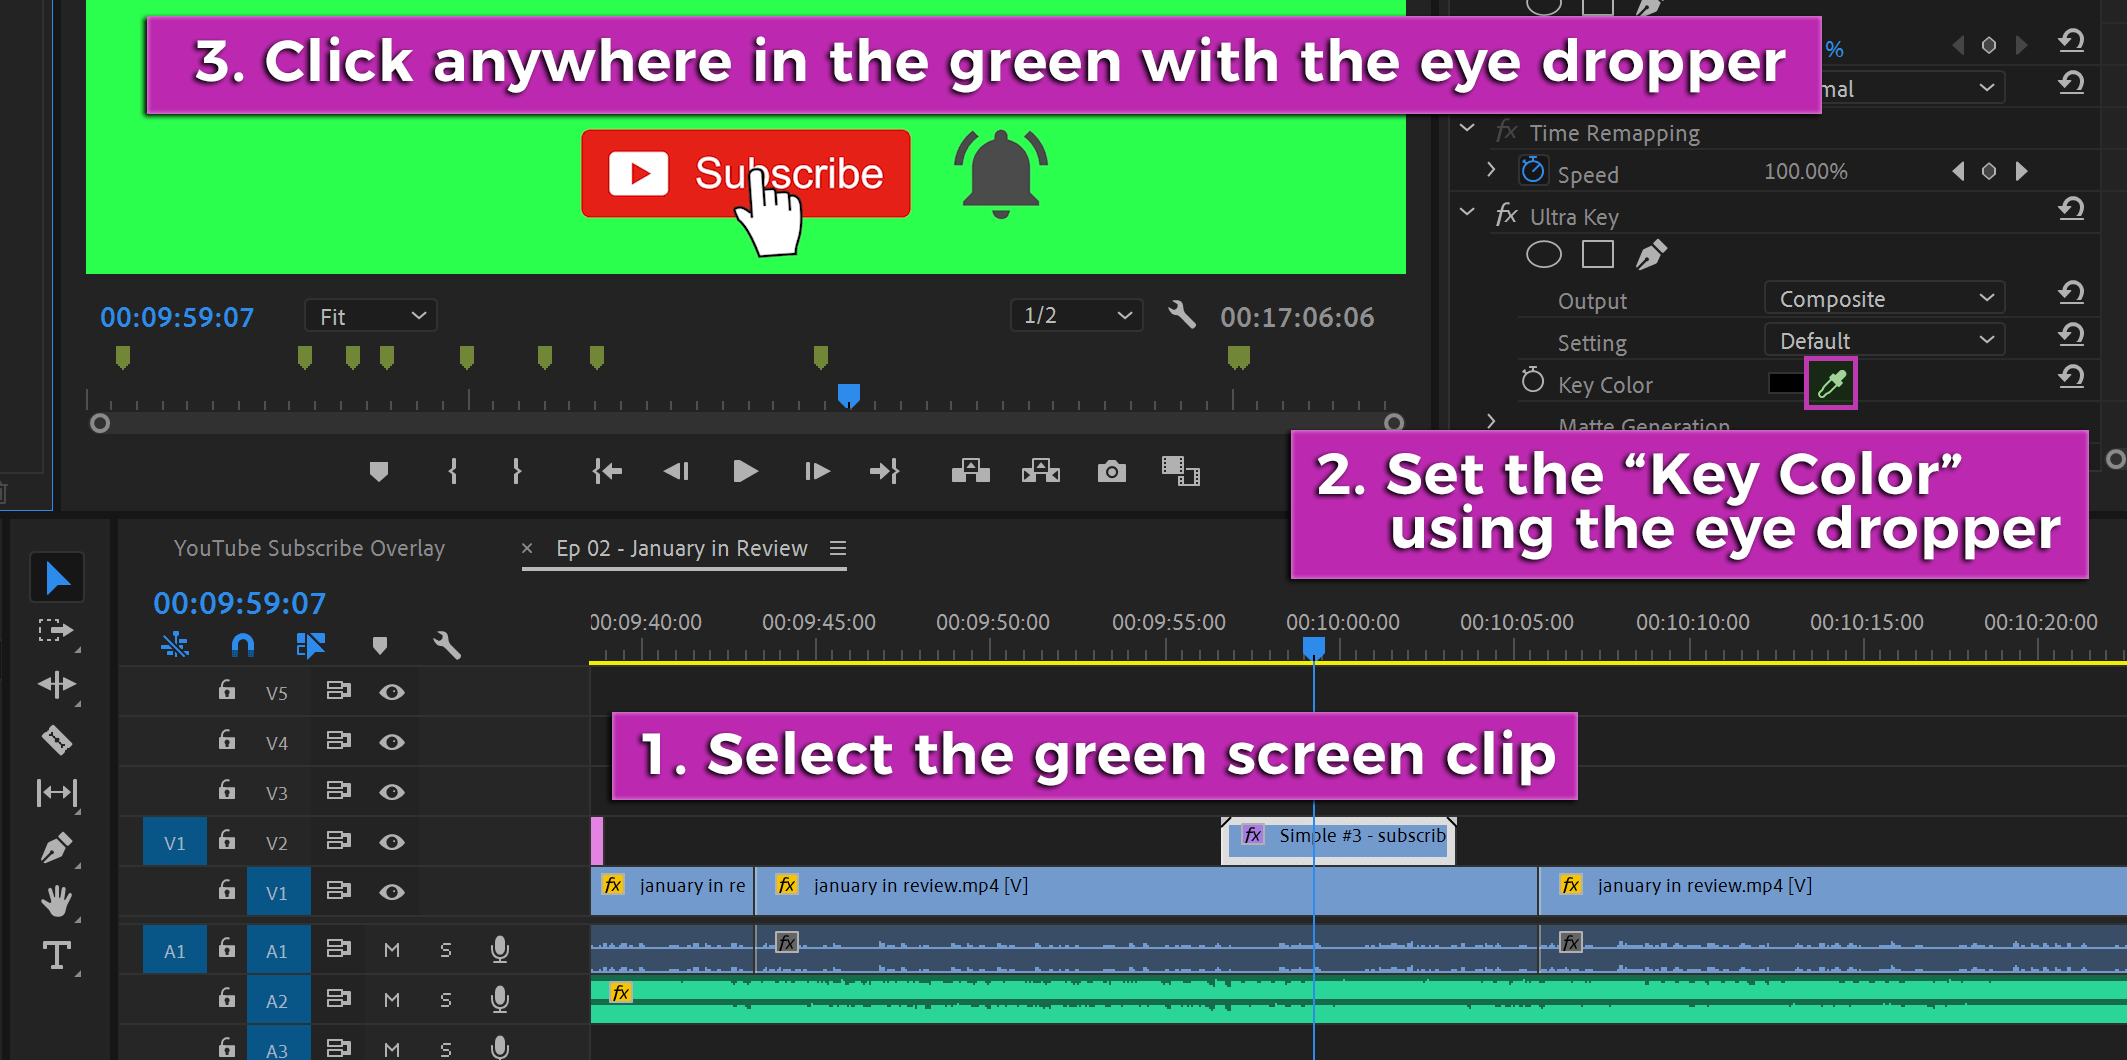
Step 3: Add the "ultra key" effect
Now that the green screen clip is on your timeline, click on the clip in the timeline to select it. You should see a white outline around the clip. Locate your "Effects" panel and search for "ultra key". Once you find the ultra key effect, drag and drop it onto the green screen video on the timeline.
Learn more: To learn more about the "ultra key" effect for Adobe Premiere Pro, check out the Adobe information page here. It goes into some nice details if that's the sort of thing you are looking for.
Step 4: Set the green color key
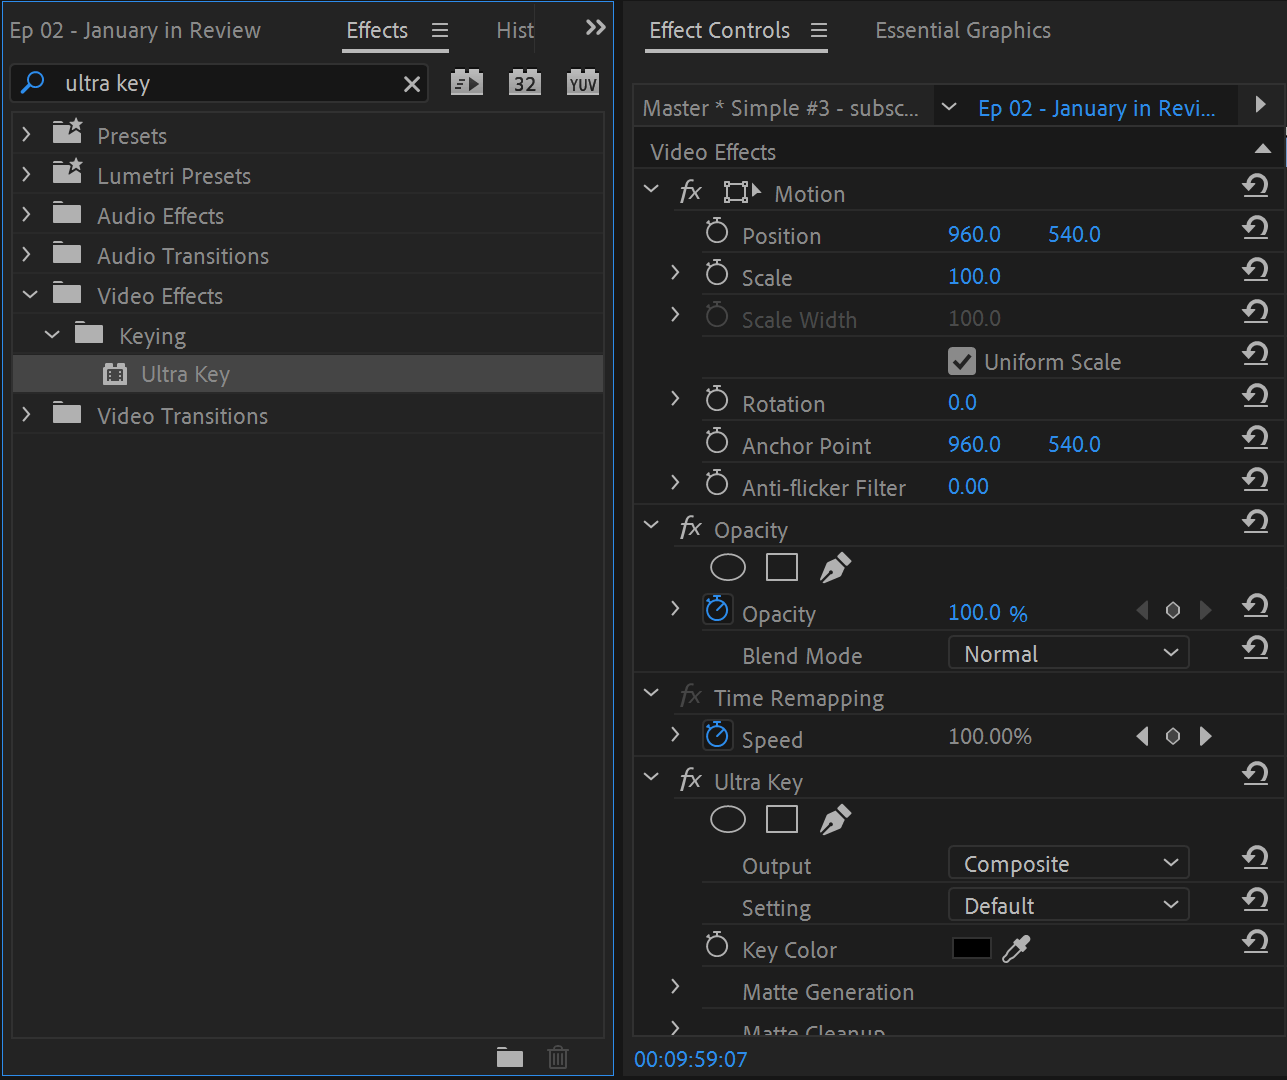
In the "Effect Controls" panel, you will see the new ultra key effect added. Now you have to set the color key to that cinematic green color on your video clip. The easiest way is to click on the little eye dropper icon for the "Key Color" option.
Then select anywhere on your green screen video where that bright green color is. Once you select the green color, your green screen clip should now appear to have a transparent background on the screen. At least everywhere the bright green color was not of course!
Ensure the correct "blend mode" is set to get your green screen effect with the best results.
You want the green screen video clip to have a blend mode of "normal". This usually gives the best results, but if not then play around with the different options and see which works best.
Got random green lines everywhere?
You might see them green hairs around your video clip because of the light distribution from the clip itself. If the video was recorded with less than even lighting, then the "green" color of the back drop may be slighting different shades of green all around the video clip.
If your green screen clip does have some stray green lines in the video itself, try to create a "mask" around your video clip. When you mask around your video subjects movement, then be sure to play the clip though several times to ensure you don't mask out any of the subject. That would be awkward. :)
Step 5: Enjoy your green screen effect!
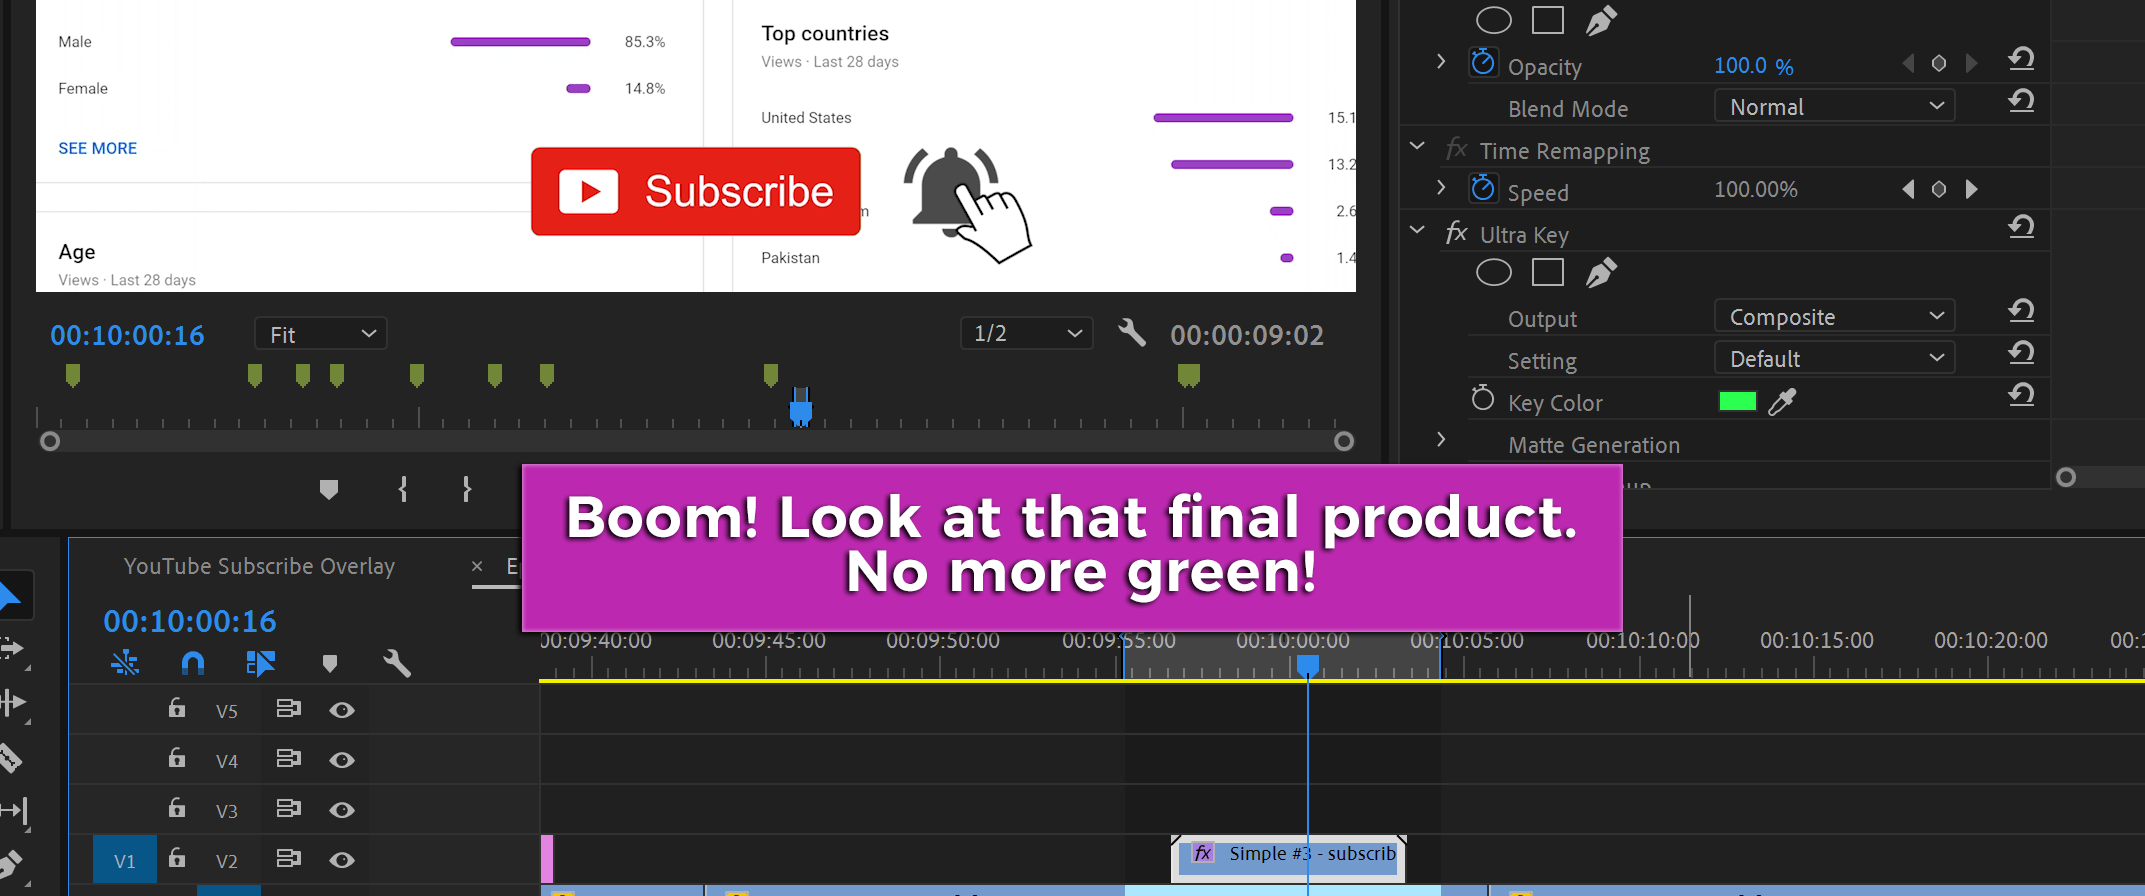
That was quick and easy green screen tutorial to create a green screen effect! Now that you've got this chroma key business down, go out there and make some super cool videos.
Happy editing!