
With OBS Studio, you can record your computer's screen with a free and pretty simple setup. Whether you are trying to make a screencast tutorial or record some game play from your favorite video game, OBS Studios is a great option.
Not only can OBS Studios screen capture on Windows, Linux, and Mac but the best part of the software is that it's free. Not like "free trial free". Simply free.
You can download the latest version of OBS Studios from their official download page. After you run through the simple installer you will be almost ready to record some sweet new screen captures.
First look at OBS Studio
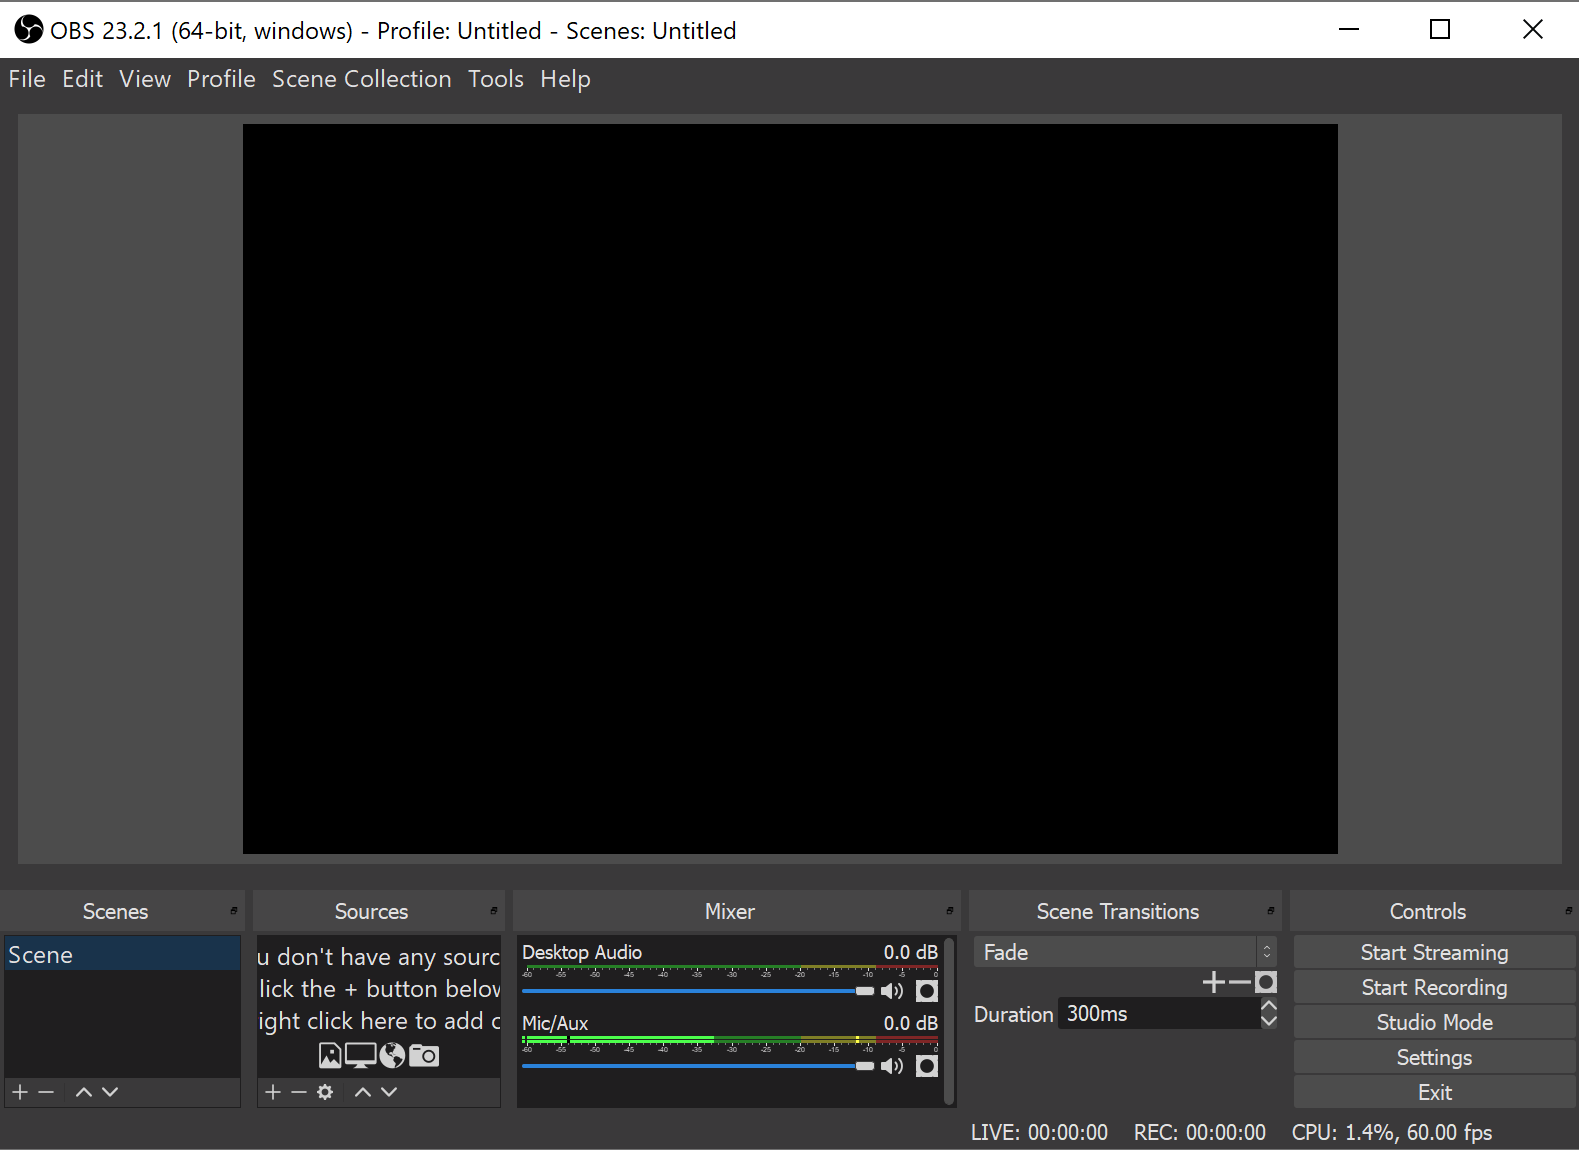
When you first open the software, you will notice the window is segmented into different sections called "docks". Each dock serves a specific purpose. The ones to focus on are the Scenes, Sources, Mixer, and Controls.
Scenes:
Think of each "scene" dock as a convenient grouping of your settings to record. For most users, you will only ever need to have just the one scene.
Sources:
This dock is THE most important. It is where you will actually control what video or audio sources are actually getting record when you capture your screen. From this dock you can select each of the different media sources to be included into your screen capture.
OBS Studios allows a great range of sources including your whole desktop screen, a specific window, a saved picture from your computer, a saved video from your computer, multiple microphone support, and the list goes on.
Mixer:
The audio mixer shows you the current audio inputs being captured on your recordings. You can have multiple audio recording devices and control the sound levels of each device individually.
Controls:
This section gives you quick button to Start and Stop recording, as well as the Settings button. Pretty straight forward.
Setup your screen capture on OBS Studios
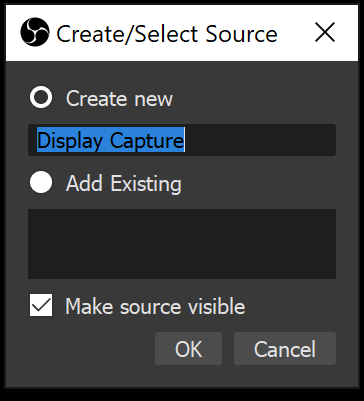
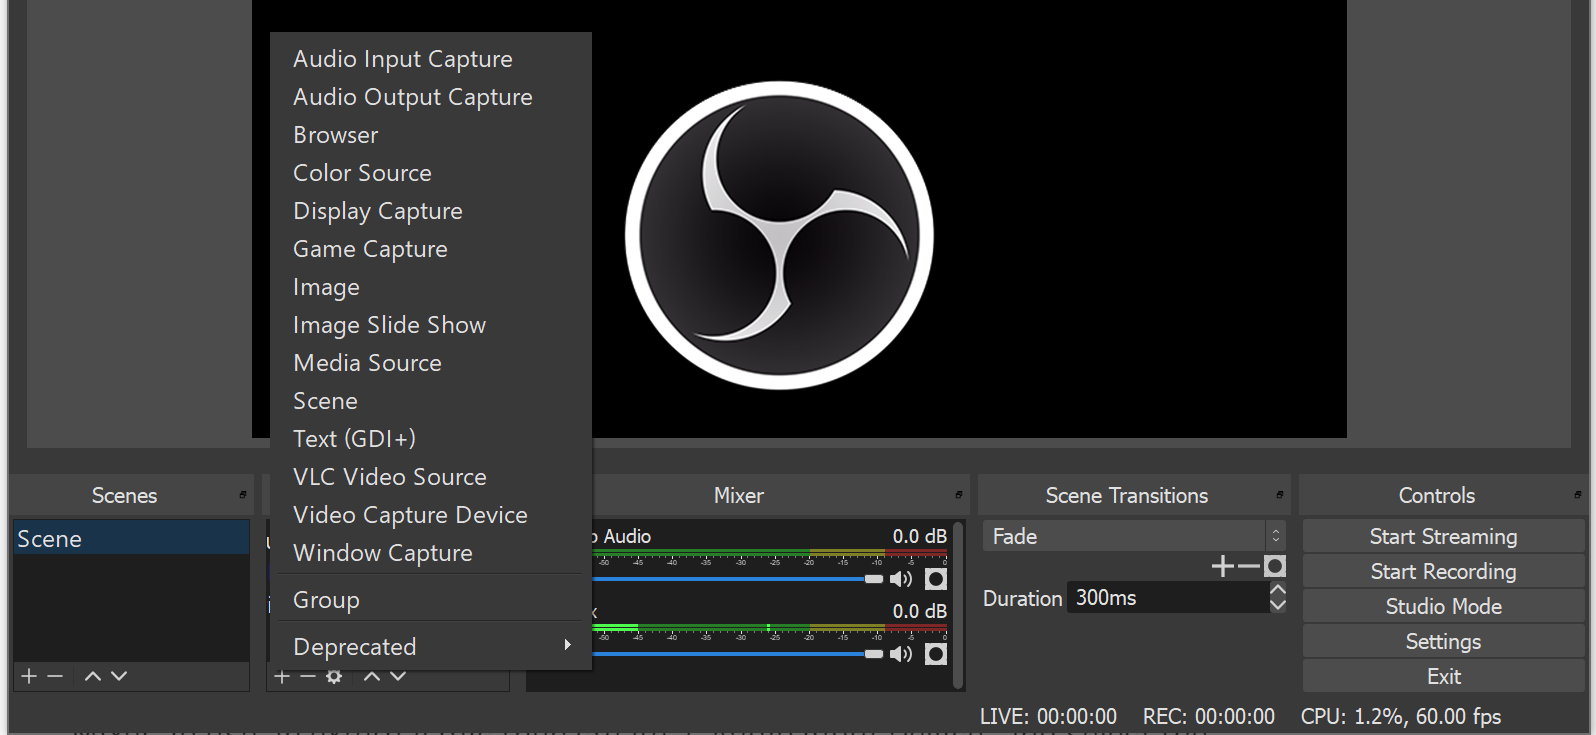
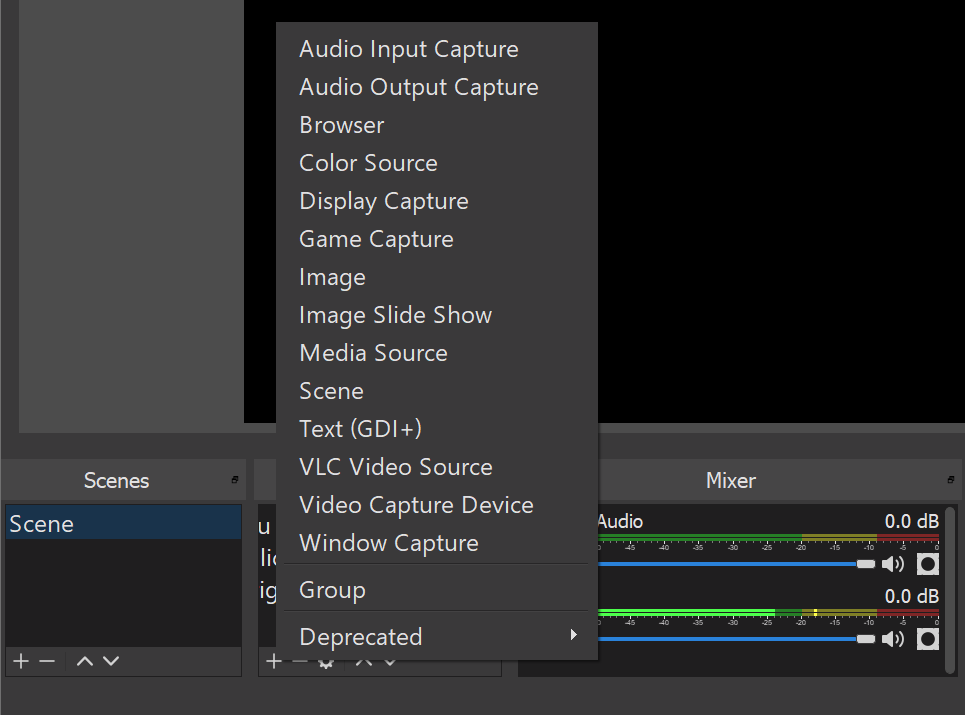
To actually get started with recording your desktop screen, you will need to add a new source. Click the "+" button on the Sources dock and select "Display Capture". You will get a popup that will allow you to name the Display source. Click "OK".
Please note: For simple screen capturing, I do not change the name from the default. But if you plan on recording multiple screens at once, then it might help you down to road to give it a nickname.
On the next window, you will be given the option to select the computer screen display you want to record. If you only have one monitor, then it should be selected by default. Once a valid display is selected, OBS Studios should show you the screen on the window. If OBS is unable to correctly load the screen video, then we need to update your graphics settings.
How to fix black/blank screen on display capture
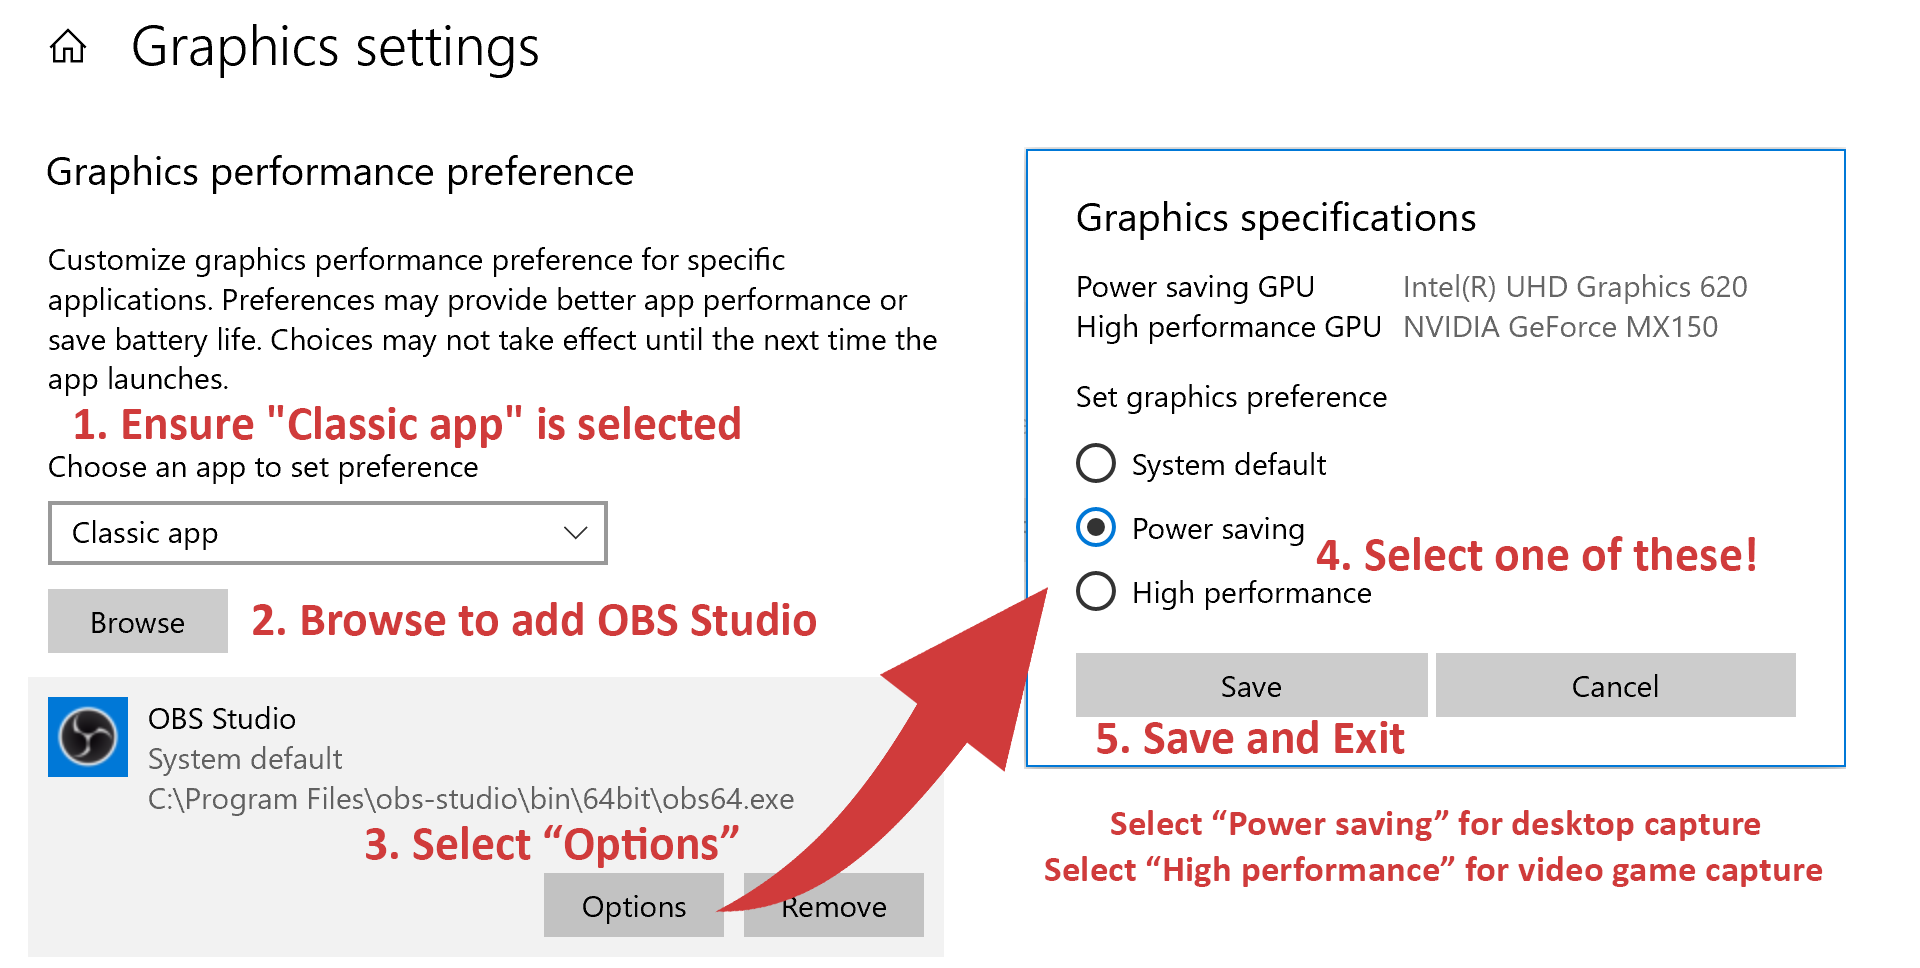
Open the Windows start menu and search for and open "Graphics Settings". Once the settings are open, you will need to add OBS Studios to the list of these customized graphics settings:
- Ensure "Classic app" is selected on drop down
- Click the "Browse" button. Navigate to the location you installed OBS Studios. Usually "C:\Program Files\obs-studios\bin\64bit" by default.
- Select the "obs64.exe" file and click the "Add" button.
- Locate OBS Studios in the list of programs and click the "Options" button.
- If you want to record your desktop screen, then select "Power Saving"
- If you want to record game play, then select "High Performance"
- Save your settings and close Graphics Settings.
- Restart OBS Studios and you should now see your screen capture working like a champ!
Record audio with your screen captures
By default, OBS Studios will record your desktop's audio (aka the system sounds your computer makes) and your builtin computer microphone, if you have one. From the Mixer dock, you can see the current list of audio sources that OBS has loaded and the current noise levels they are each detecting.
Most people will not want to record their audio from the builtin microphone on their computers, and why should they. Usually these microphones don't have that great of audio quality. Lots of background noises get picked up. Just crappy mics all together.
I like to use the PurplePanda lavalier/lapel microphone. It is a sturdy and inexpensive mic with great audio quality. You can get it on Amazon for like $30.
Plug in your external microphone or headset. Once your computer has fully loaded and recognized the new device, we need to add it to OBS Studios. Add a new source by clicking the "+" button in the Sources dock. Select "Audio Input Capture". Just like adding a display capture before, you will get a popup to name the new source. Click "OK". Select the audio device you want to record with using the dropdown. Then click "OK" again.
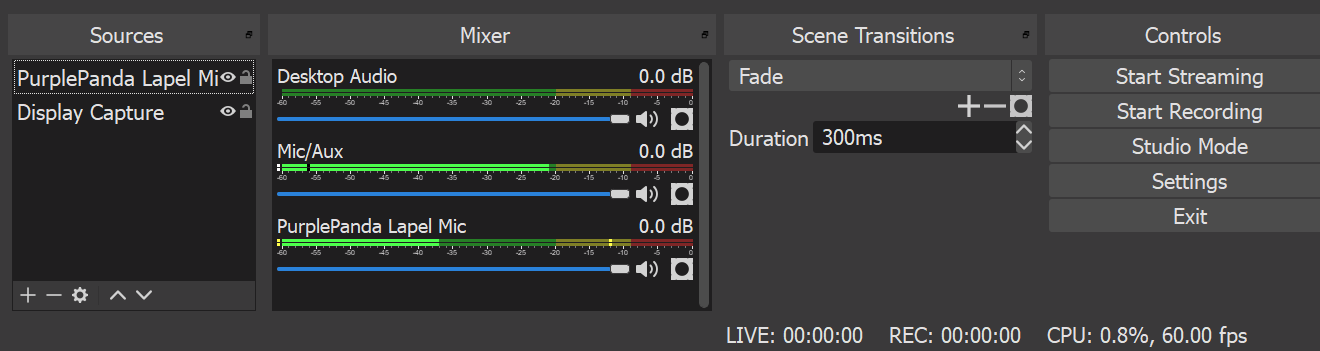
In the Mixer you should see the list newly created Audio Capture Device. You will also notice the sound levels being picked up by each of your audio devices. For me, I have three devices: Desktop Audio, Mic/Aux (built in computer mic), and my PurplePanda lapel mic.
So when I record screen captures all three audio devices will be recorded. It would be silly to record the same audio from two devices, especially when one of them will be high quality (PurplePanda lapel mic) and other will be low quality (built in laptop mic). So be sure to lower the volume of the built in mic, or any other device you don't want to be recorded.
After you have selected your desired audio sources, try to play around with the some of the different settings and other sources to get the best results for you and your videos.
Best settings for recording screen in Windows?
Now that you can record your screen captures, you can be off to the races! But why not get a quick tune up before the race? By updating a few quick settings, your screen recording will be top notch and ready for your editing or uploads.
Recording quality:
"High Quality, Medium File Size". With this set, your videos will be top notch quality but take up slightly less space when storing lots of recordings. I have found there is not a noticeable difference in video quality either!
Recording format:
MP4 It is a must! MP4 is the most common video format for recording and is
well accepted by not only videos editors, but also allows for easy direct
uploads to YouTube.
Encoder:
This one depends on your computer. If you have a beefy graphics card then you
will want to select Hardware. If you have a beefy processor like an Intel I7
with lost of RAM, then you will want to use "Software".
Audio sample rate:
44.1khz enough said.
Video downscale filter:
Lanczos this will ensure your video gets the best quality when you are
recording.
Video FPS:
60 FPS if you are recording video game play or any sort of super fast moving
screen captures.
30 FPS is you are recording regular desktop screens and applications.
Happy recording 😄
Now that you have your sweet new screen recording software setup, go out and record some amazing videos.